0. Getting started
0. Getting Started
Audience: All users (directors, admins, staff)
Purpose
Helps you quickly understand and start using StepNote's key features when you sign in for the first time.
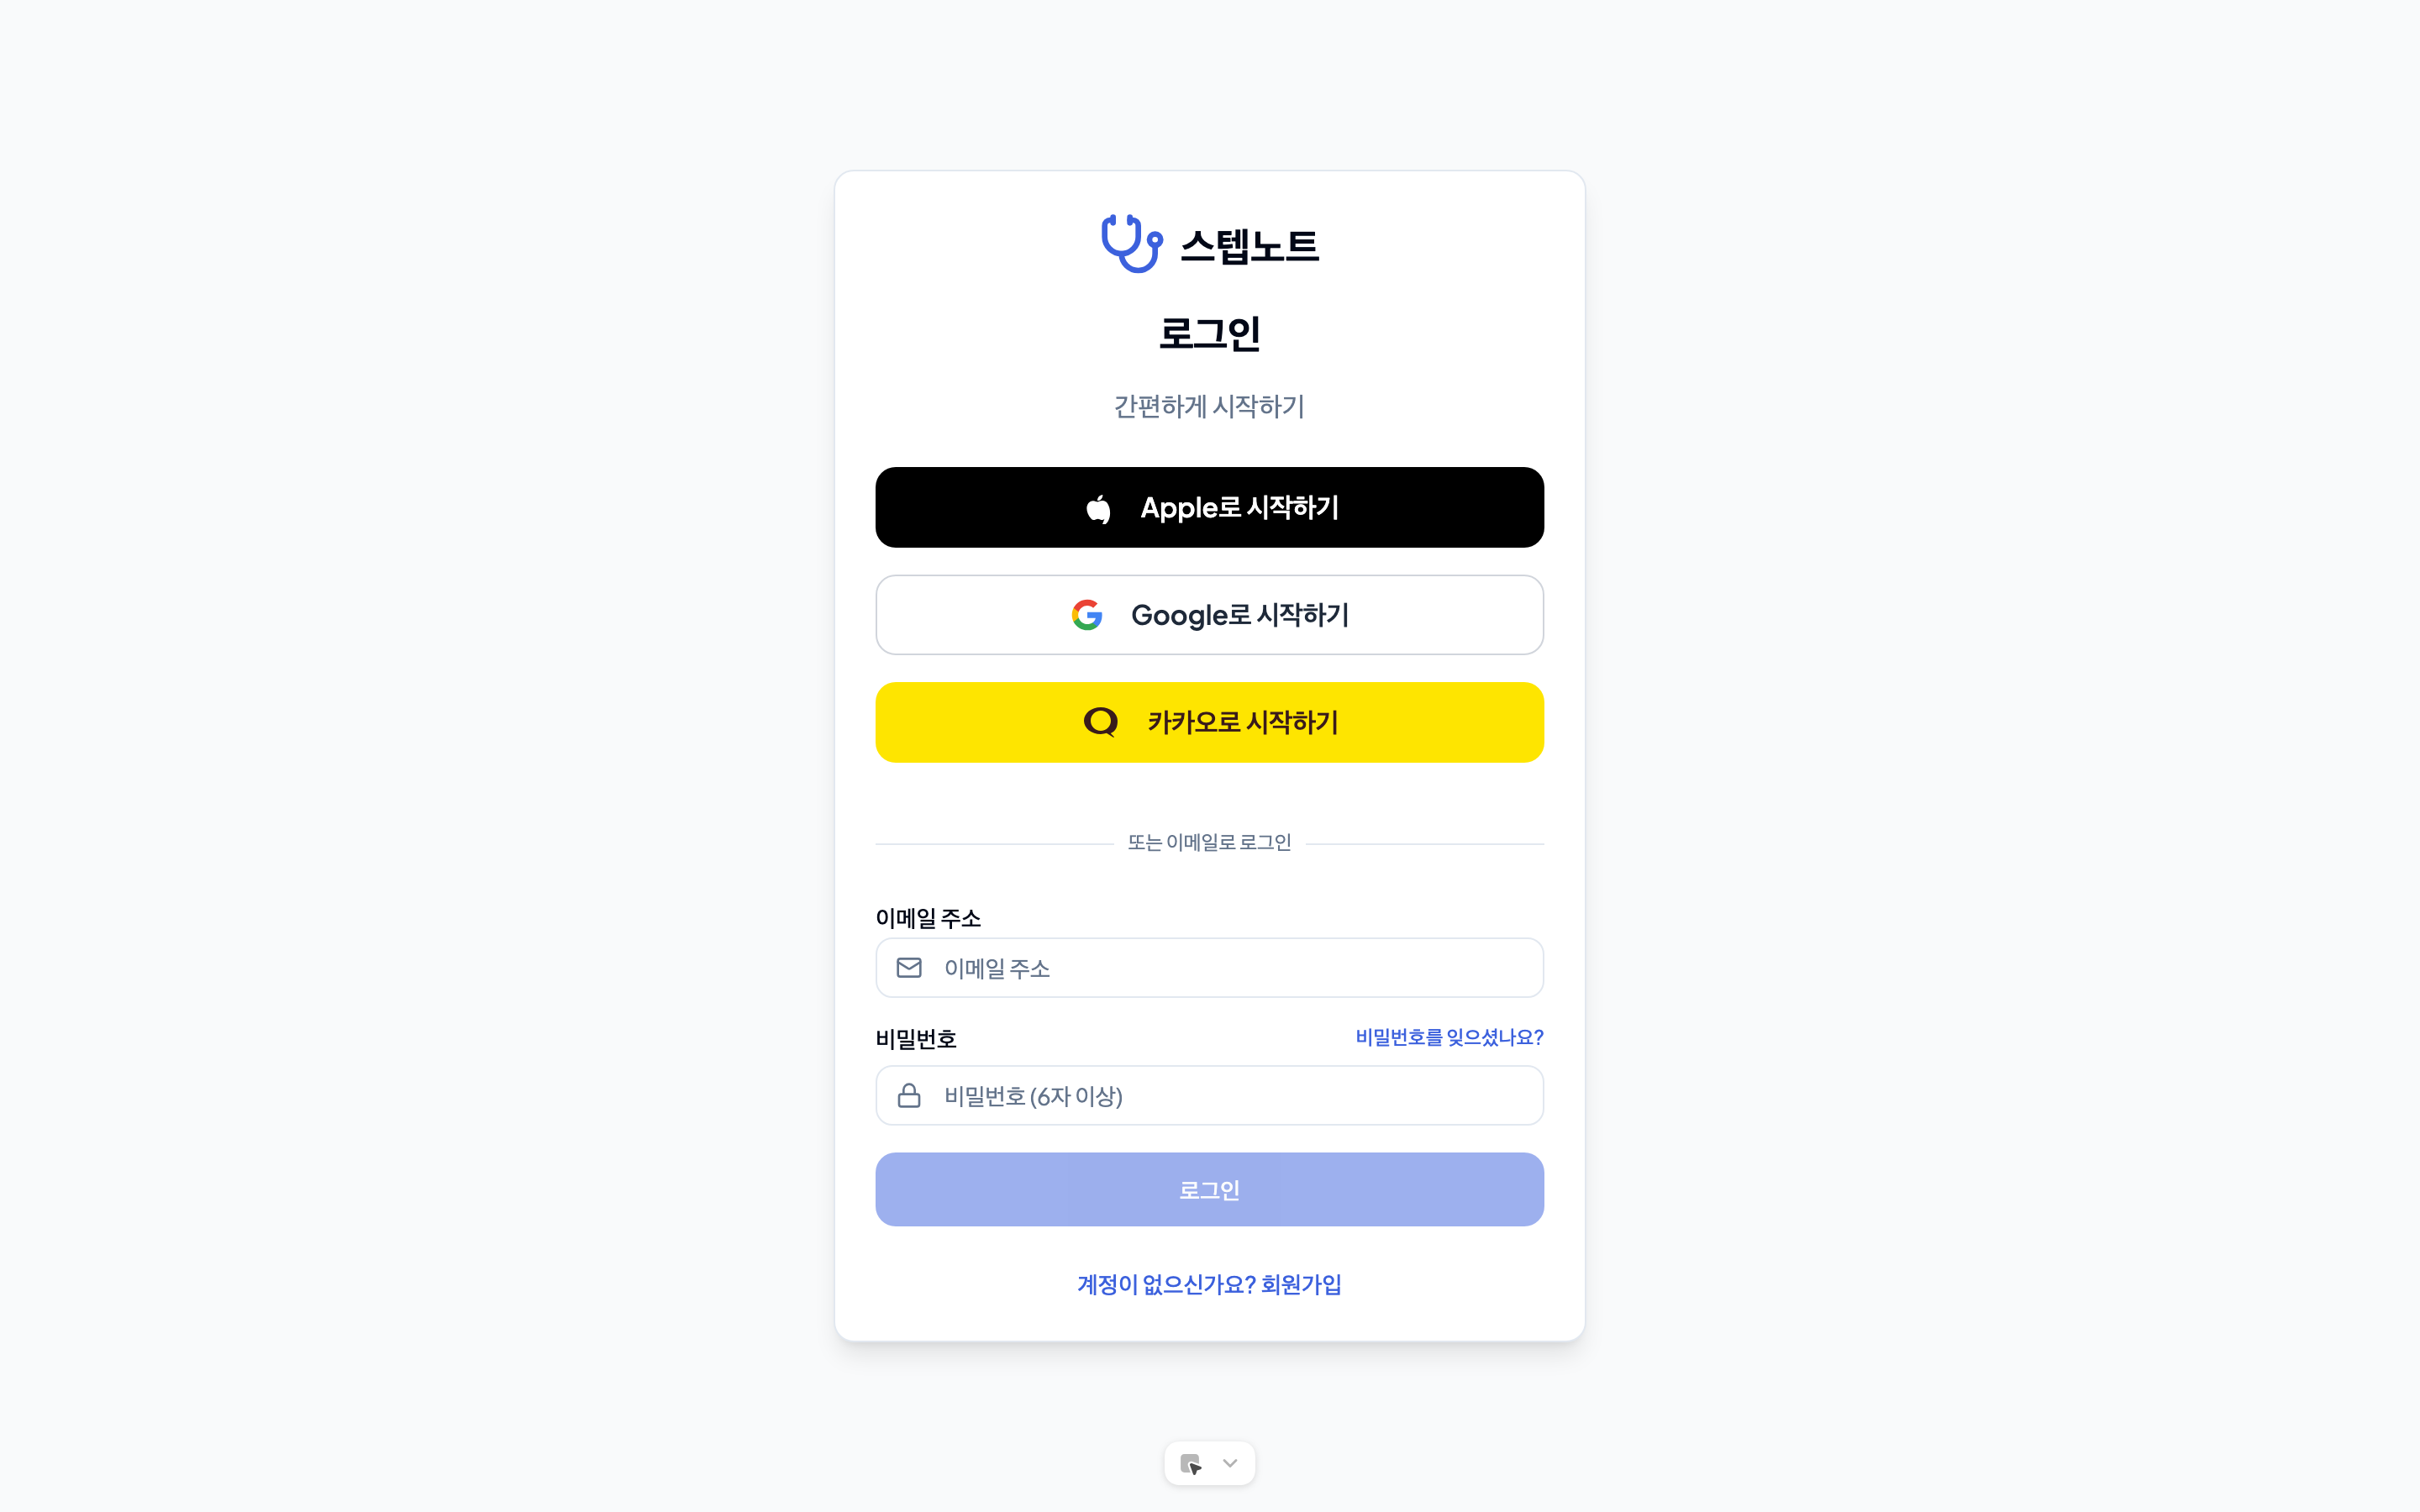
Sign In / Sign Up
When you open StepNote, the sign-in screen appears. You can get started in one of the following ways.
- Sign in instantly with an Apple / Google / Kakao account (Apple sign-in is recommended on the iOS app)
- Email + password sign-in — phone number verification is required when signing up.
After signing in, you can see the list of clinics you belong to on the My Clinics screen. Click the "View clinic" button at the bottom right of a card to go to that clinic's management page.
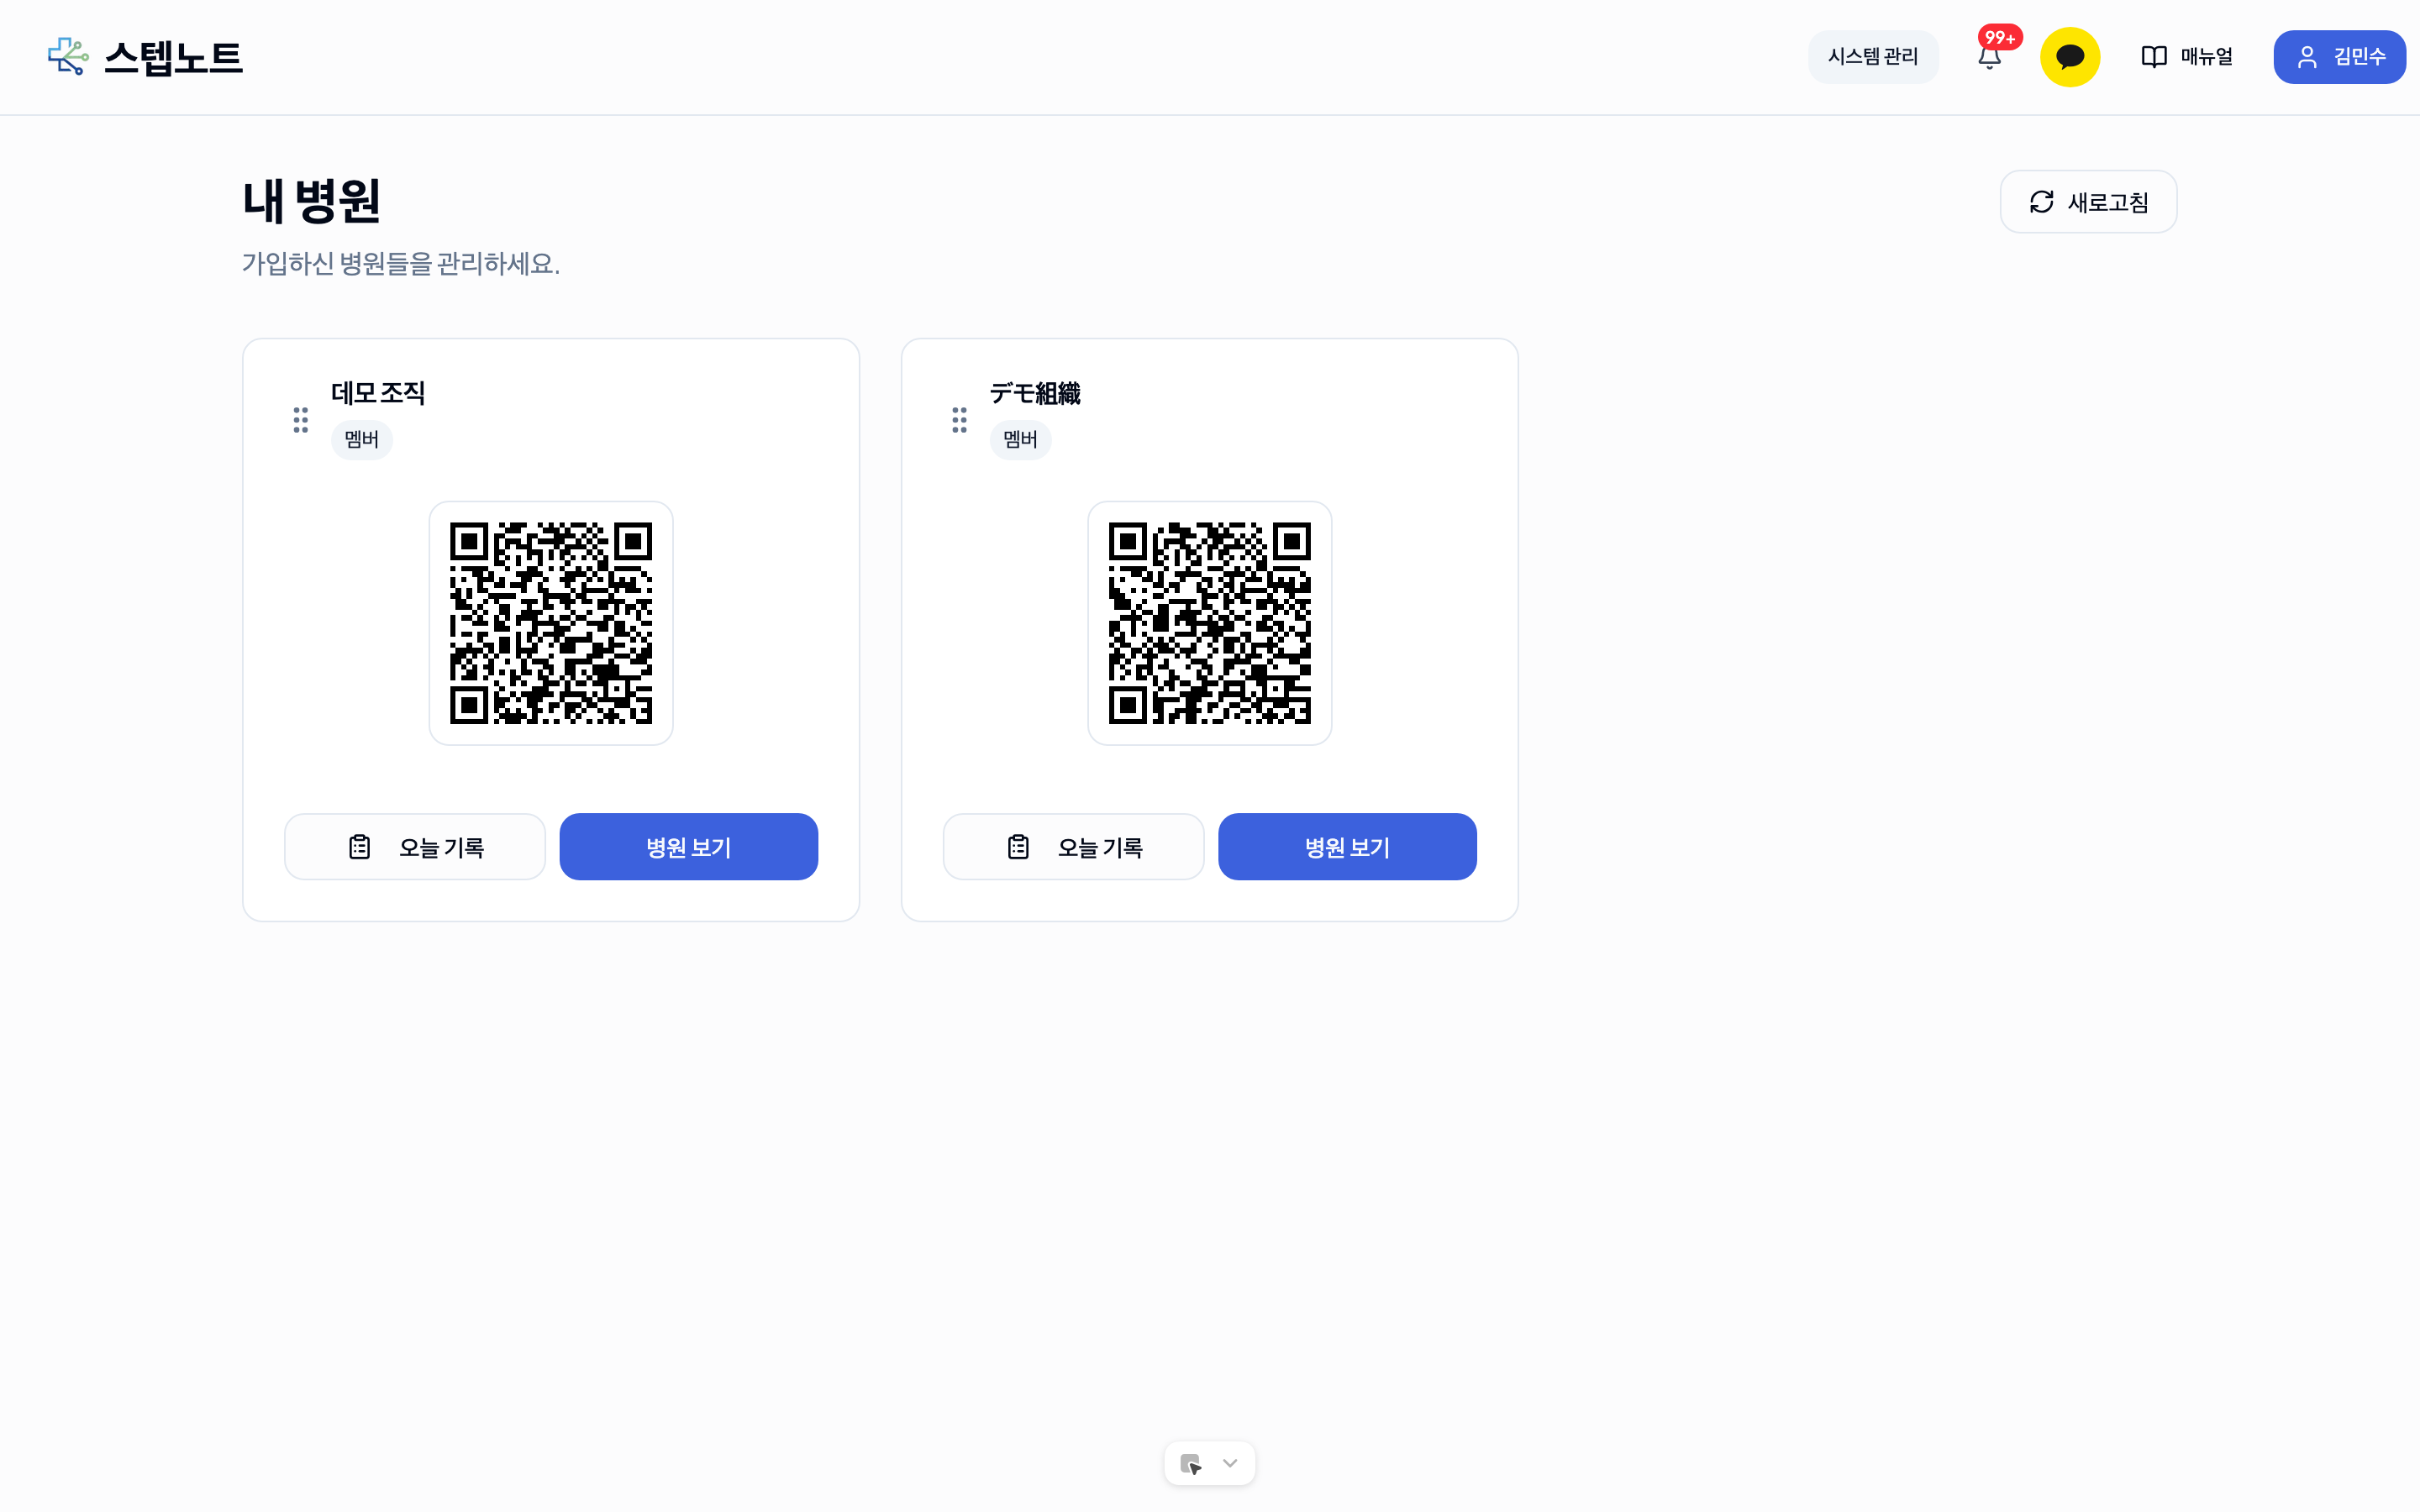
💡 Tip: If you belong to multiple clinics, you can drag the cards to arrange them in the order you like. The order is saved automatically.
Changing the Display Language (New)
Each staff member can now pick their own display language individually. (Previously, everyone followed the clinic's single language setting.)
- Go to your avatar → "Profile".
- On the profile page, use the "Language" card to choose 한국어 / 日本語 / English.
- The entire screen switches to that language immediately — there is no separate save button.
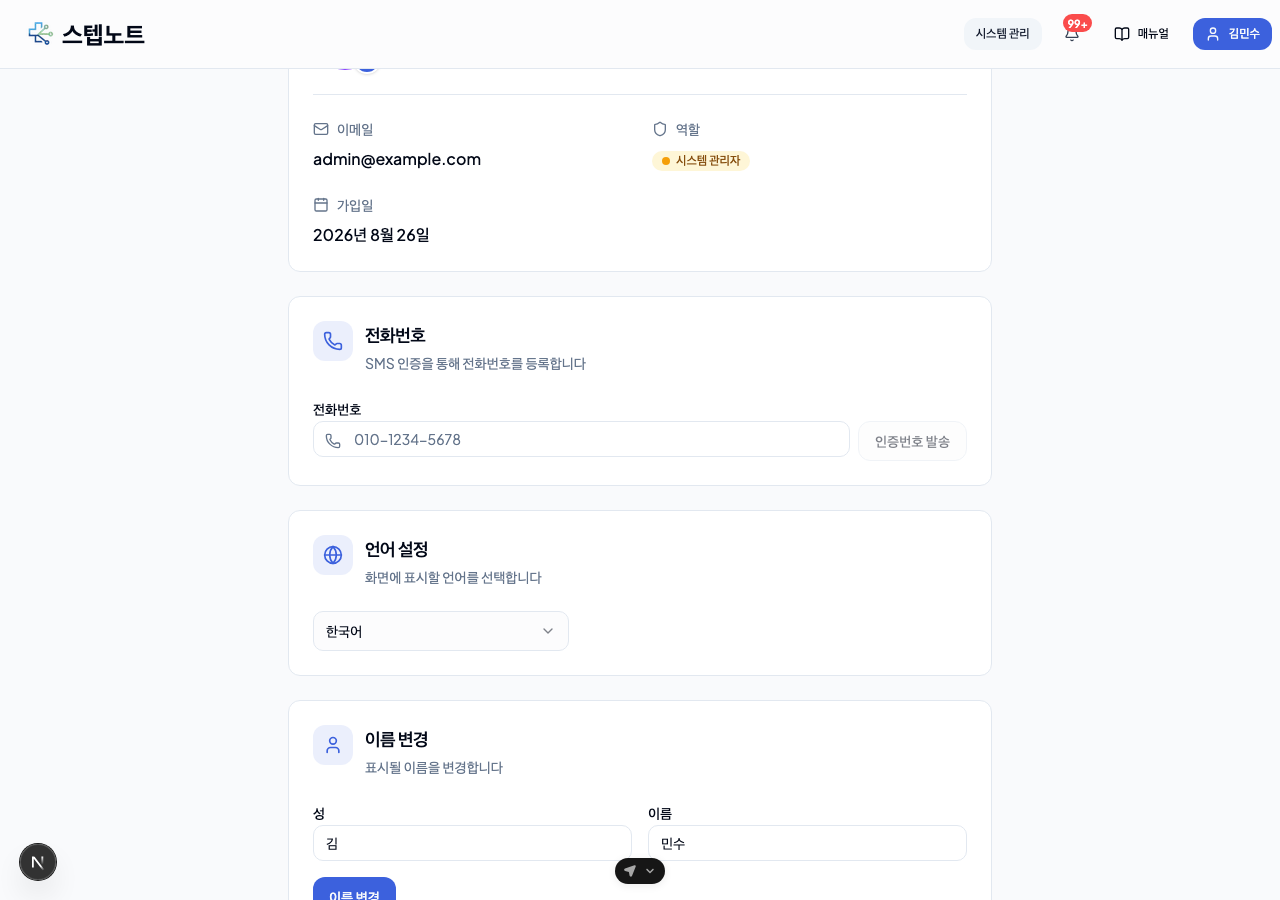
Your chosen language is kept even after you sign out and sign back in. Staff at the same clinic can each view the app in a different language.
Get Started Tab
Once your clinic is created, a 🚀 Get started entry appears right below Home in the left menu, and this screen opens first whenever you enter the clinic. Under the heading "Do these in order and you're set" it lists the five things needed before this month's schedule is on the wall. The count of items left shows at the top, finished items are marked done, and items you can skip are marked optional.
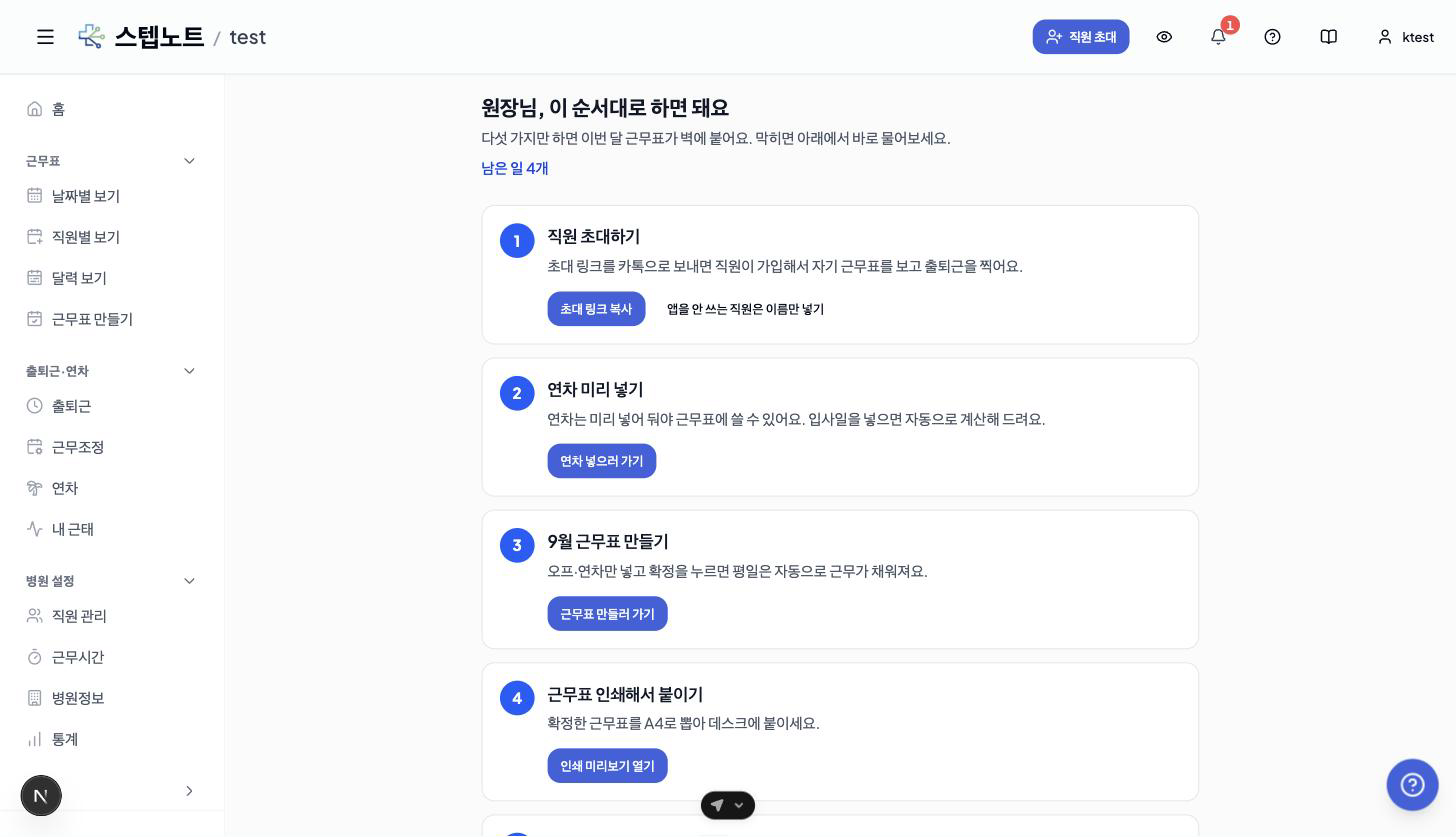
| # | To do | Button | What it does |
|---|---|---|---|
| 1 | Invite your staff | Copy invite link / Add staff who won't use the app by name | Send the link in your group chat and staff sign up themselves. Staff who won't use the app can be added right here with just a name and an optional department; Add and add another keeps the form open. You can link an account later by inviting them from Staff management |
| 2 | Grant leave in advance | Go to leave | Opens the Annual leave tab. Leave must be granted first before it can be used in the schedule |
| 3 | Make the schedule for this month | Go to schedule | Opens the Shift Planner |
| 4 | Print and post the schedule | Open print preview | Opens the print preview of the confirmed schedule right away |
| 5 | Make a clinic website (optional) | Go to website builder | Builds a website from the clinic name and hours |
Two more cards sit below the checklist.
- Stuck? Ask us anytime: three ways to reach us — Help chat (the speech bubble at the bottom right of the screen), Ask on KakaoTalk (quick replies on weekdays) and Book a 30-min video walkthrough (we set things up together over screen share, free of charge).
- What is the Work tool?: chat, notices, a calendar and a document box used only inside the clinic, instead of a staff group chat. People who leave are removed automatically. Turn on the Use the work tools switch and a Work menu appears at the bottom of the left menu; you can change this anytime in clinic settings.
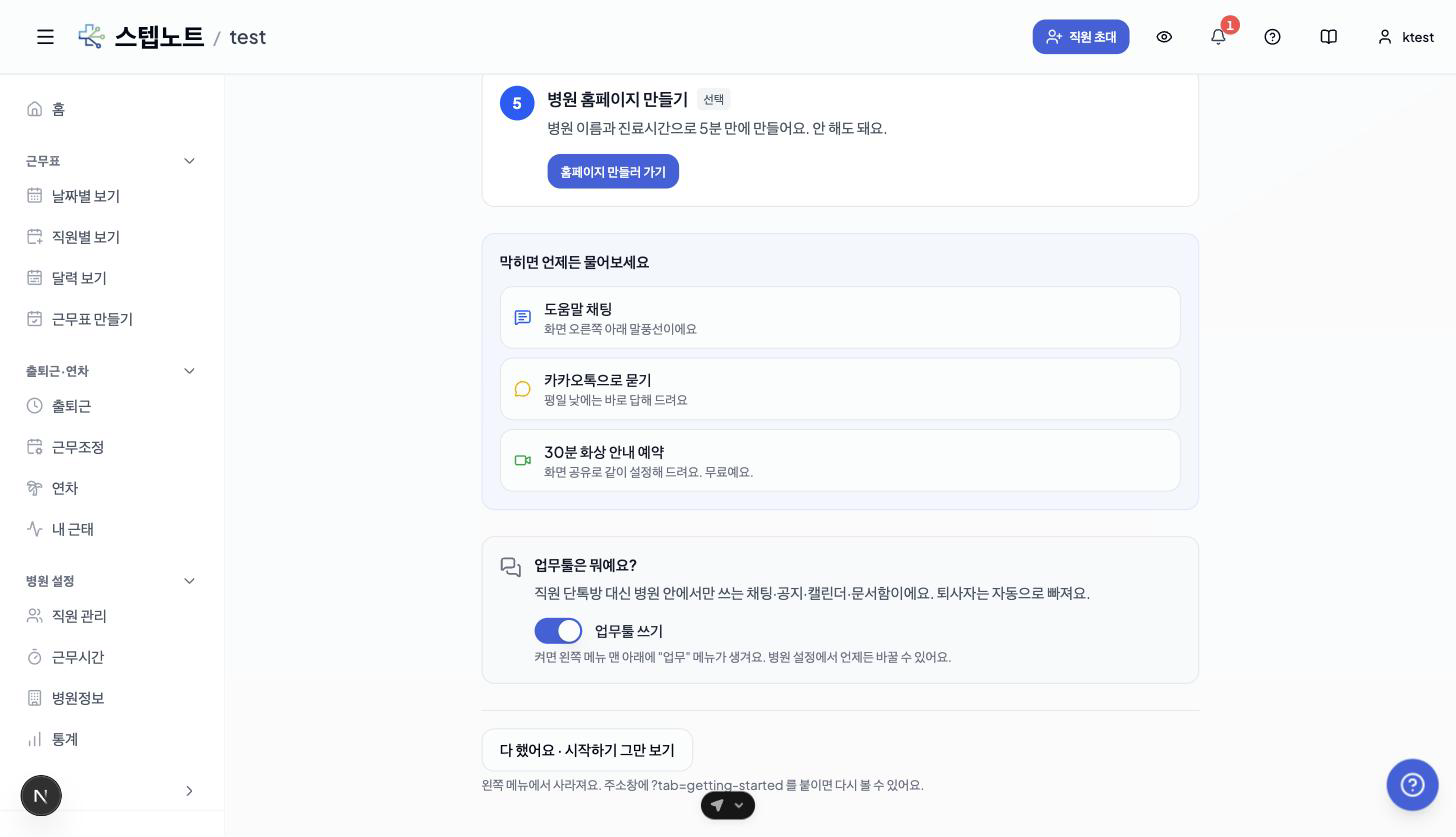
When all five are done, or you no longer need the list, press All done · Hide Get started at the bottom. The entry disappears from the left menu, and from then on the clinic opens on the schedule Daily view. To see it again, add ?tab=getting-started to the end of the address in the address bar.
💡 Until you hide it, a "Get started — N left →" banner at the top of other screens brings you back anytime.
Switching View Modes (Admins Only)
Directors and admins (Owner / Admin), as well as system admins, see a yellow "Member view" button at the top right of the screen. Regular staff do not see it.
-
Viewing as a regular member
- Press the button to switch to the same view a regular staff member sees. Admin-only menus and buttons are hidden.
- A notice banner appears at the top of the screen: "Viewing as a regular member — admin features are hidden."
-
Returning to admin mode
- Press the "Return to admin mode" button in the same spot to go back to your original view.
-
Good to know
- Only the view changes — your actual permissions stay the same. You do not lose admin access.
- The mode you choose is remembered per clinic, and the last mode you picked persists the next time you sign in.
💡 Tip: Use this to preview the screens you'll show staff, or to check how announcements and the work schedule look from a staff member's point of view.
Locked Features & Feature Requests (New)
You may see menu items in the sidebar that appear greyed out with a lock (🔒) icon. These are optional features that haven't been activated for your clinic yet (e.g. payroll management, smile analysis, AI chatbot, work collaboration).
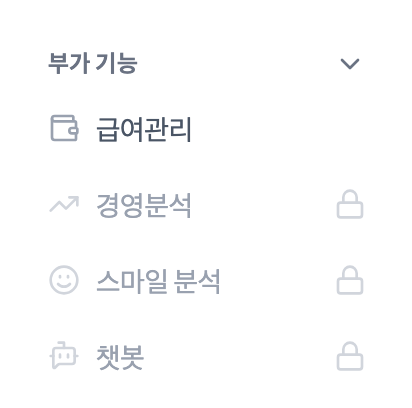
- Clicking a locked menu opens a "Feature request" confirmation dialog.
- Press "Request" to open a KakaoTalk channel, where you can ask to have the feature activated right away.
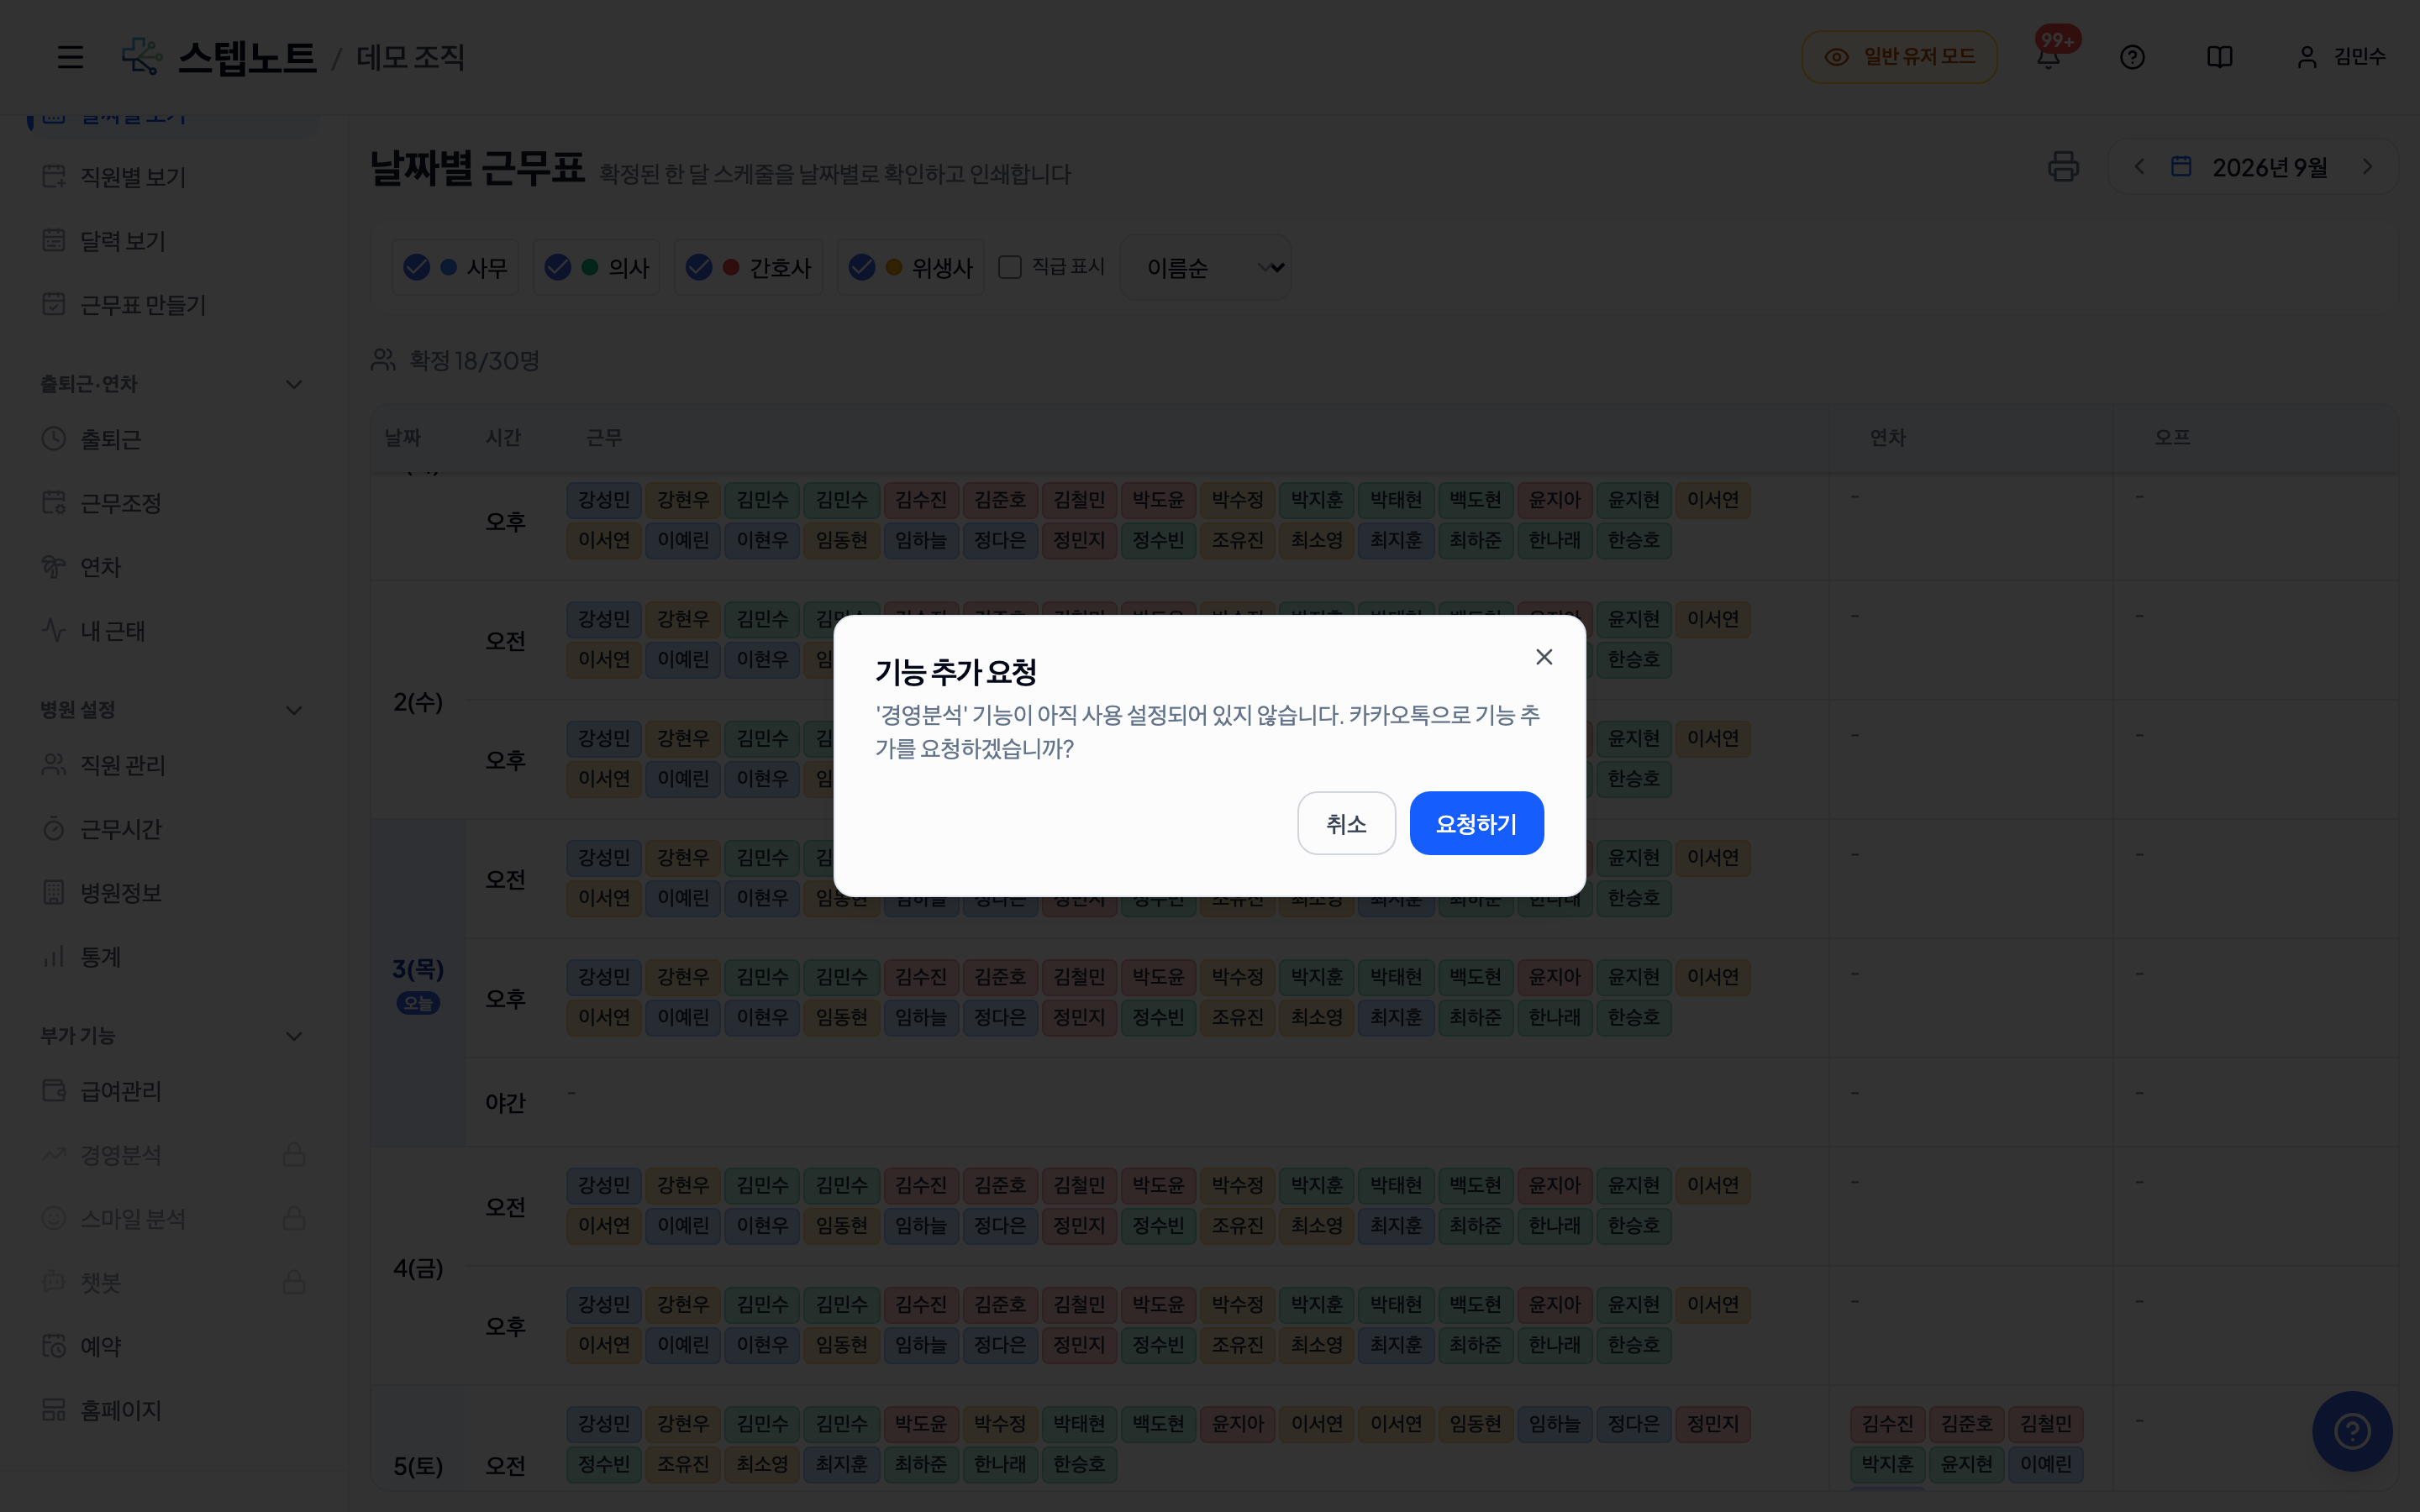
💡 Clicking a locked menu item does not open a screen — the lock icon means the feature isn't available yet.
Help Tooltips
Every major screen has a question mark (?) icon. Hover over or click it to see a short explanation of that feature.
-
Screens with tooltips (examples)
Screen Tooltip content Staff invite modal Explains email/link invite methods and permissions Attendance record table What each column means and how to make corrections Annual leave grant modal Details about days granted and the effective date -
How to use
- Hover your mouse over the question mark (?) icon and the tooltip appears.
- Focusing it with the keyboard Tab key works the same way.
- It disappears automatically when you move the mouse away or focus leaves.
Empty-State Guidance
Screens with no data yet (for example, when you haven't joined a clinic, or there are no attendance records) show a helpful message.
- It tells you what to do next from your current state.
- Where possible, a button is provided to jump straight to the next action (for example, getting an invite or entering a schedule).
Recommended Order to Get Started
If you're new to StepNote, we recommend the following order.
Admins (Admin / Owner)
The Get started tab that opens right after you create a clinic walks you through the same order.
- Invite your staff → 1. Inviting Members
- Share the invite link; add staff who won't use the app by name
- Grant leave in advance → When you want to manage staff annual leave
- Check hire dates, then grant leave per member (see 2. Managing Members)
- Make the schedule for this month → 3. Entering Shifts, Annual Leave, and Offs
- Add days off and leave, then confirm
- Print and post the schedule → the printing part of 3. Entering Shifts, Annual Leave, and Offs
- The Print button in the schedule Daily view
- Make a clinic website (optional) → 8. Homepage Builder
Regular Staff (Member)
- Join a clinic — sign up with the invite link or signup code shared by your admin
- Clock in/out — check in and out via terminal (QR), WiFi, beacon, smartwatch, and more
- Check my schedule — view your shifts, annual leave, and offs on the calendar
System Requirements
- Recommended browsers: Chrome, Safari, Edge (latest versions)
- Mobile: iOS / Android apps available (App Store, Google Play)
- Internet connection required
Having Trouble?
- Please refer to each section of this manual.
- Help chat: press the speech bubble at the bottom right of the app screen to ask right away.
- Ask on KakaoTalk: StepNote KakaoTalk channel — quick replies on weekdays.
- 30-minute video walkthrough: Book a slot — we set things up together over screen share, free of charge.
- Email us: support@stepnote.works