Each department has its staff
When you want to organize departments and staff
Create departments and register your staff — by the end of this page, each staff member can handle attendance, schedules, and annual leave with their own account.
✅ Before you start
- Have you created your clinic and finished the basic setup? If not → When you want to set up your clinic for the first time
1. Create departments
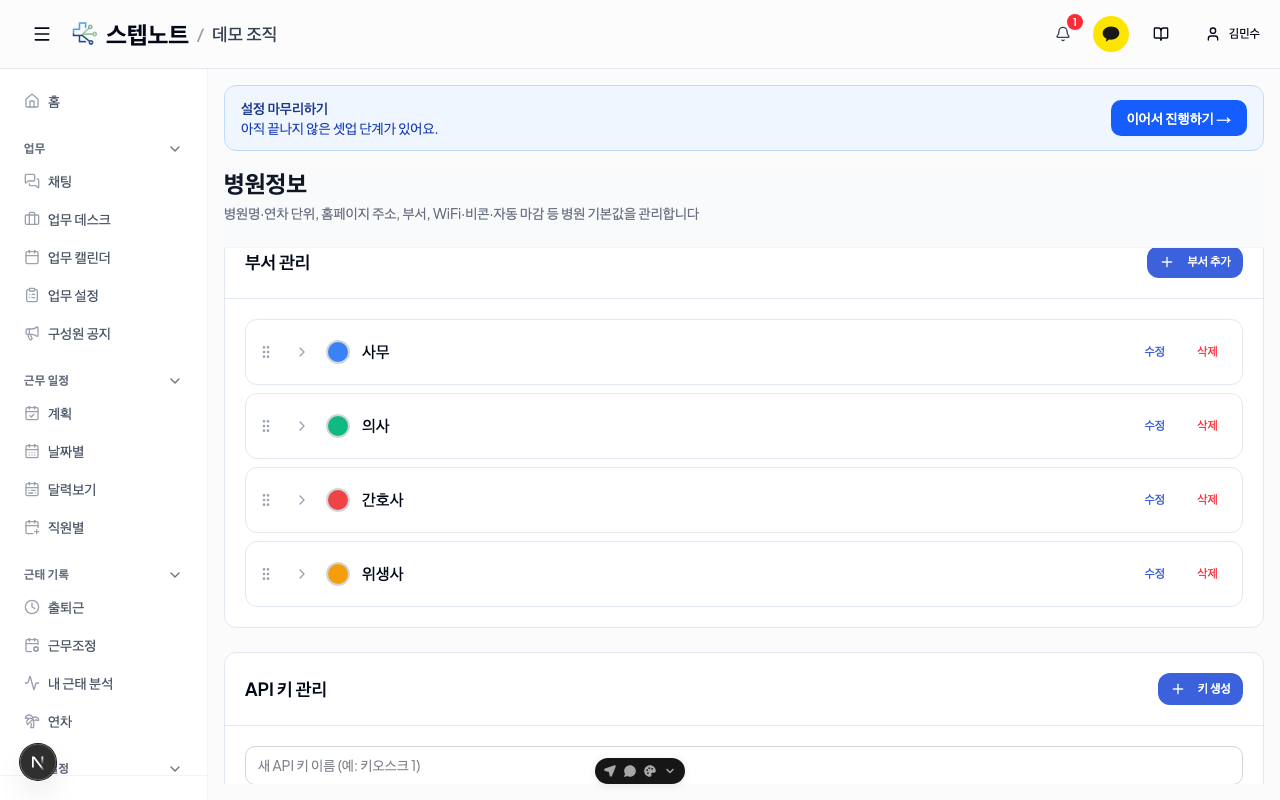
Go to the Department Management sub-tab under Clinic Settings → Clinic Info in the left menu. Press Add department, choose a department name (e.g. Treatment Room · Hygienists · Administration) and a color, and it's added to the list.
The departments you create here become the basis for grouping by team in staff registration, work schedules, and statistics screens.
2. Add staff
At the top right of the Clinic Settings → Staff Management screen in the left menu, there are three methods.
| Method | When to use it | How it works |
|---|---|---|
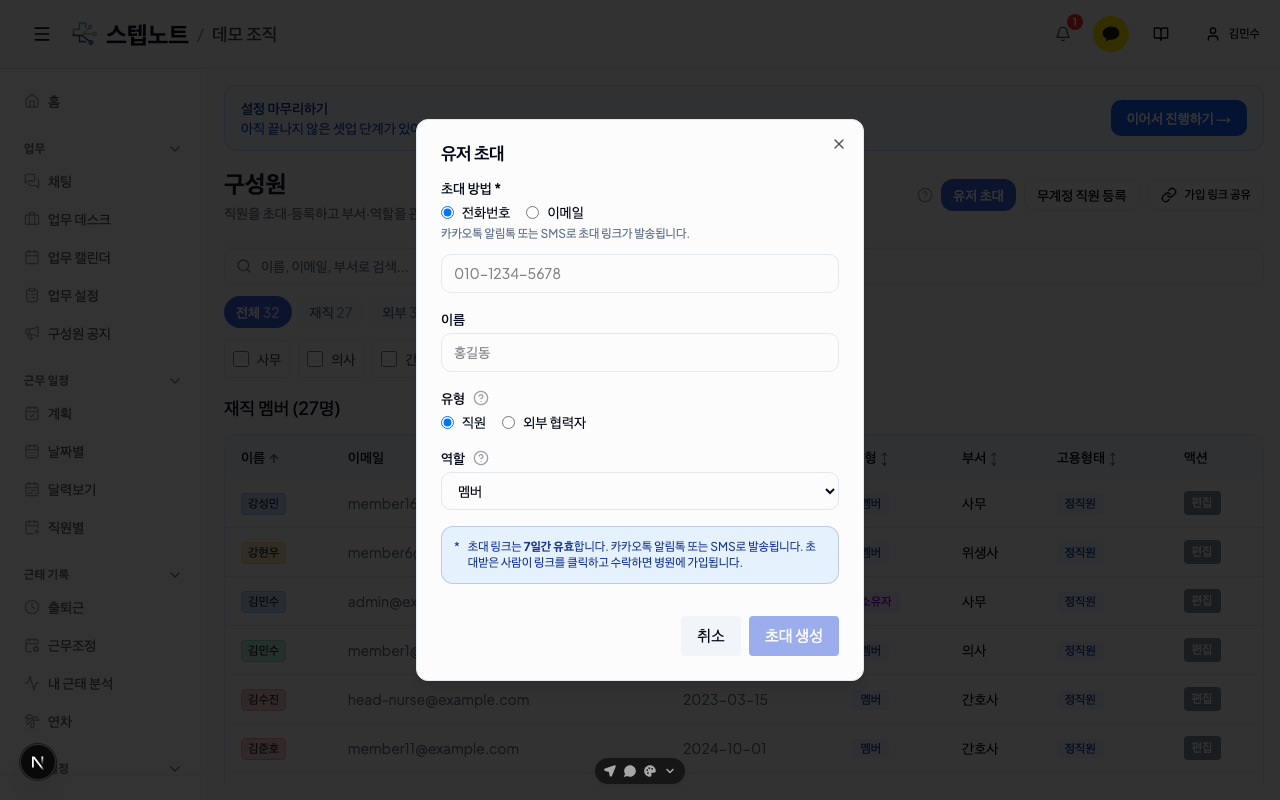
| Invite user | Sending a precise invitation to one staff member who will use the app | Enter a phone number (KakaoTalk notification/SMS) or email → choose name, type, and role → Create invitation |
| Share sign-up link | Recruiting several people at once, e.g. by sharing in a group chat | Share sign-up link → Copy link (or share via KakaoTalk) → staff sign up through the link → administrator approves |
| Register accountless staff | Contract or part-time workers who won't use the app | Enter only name and type, then Register (no login account is created) |
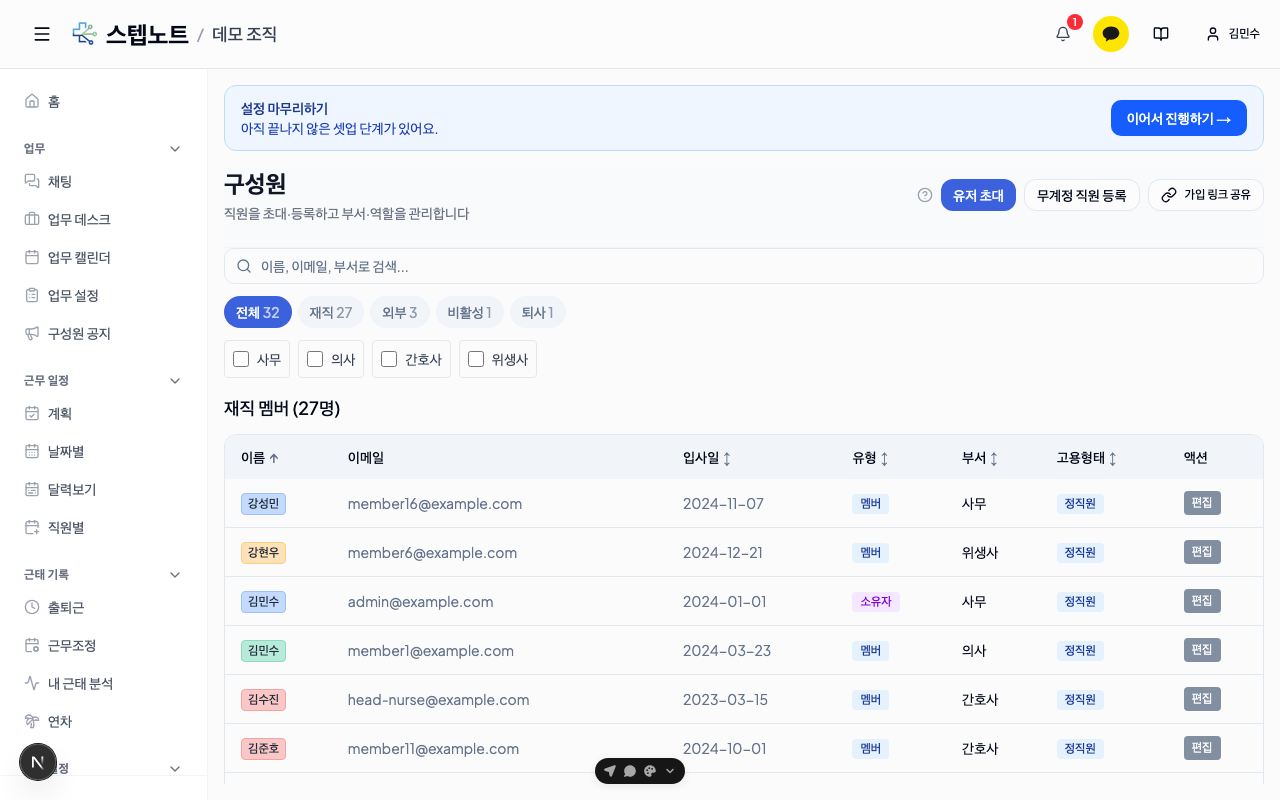
💡 You can also copy the signup link right away from the "Invite staff" button in the header at the top of the screen (shown automatically when you have fewer than 3 staff members). If you just created your clinic, the fastest way is the Copy invite link button under step 1, Invite your staff, in the Get started tab in the left menu; staff who won't use the app can be added by name right there with Add staff who won't use the app by name.
In the Invite user modal, choose either phone number (sent via KakaoTalk notification/SMS) or email, enter the name, type, and role, then press Create invitation. Invitation links are valid for 7 days.
💡 What is accountless staff? A way to add someone to the roster directly, with the administrator entering only a name and type — no login account is created. Use it for people who won't use the app themselves, such as contract doctors or part-time workers. They cannot log in, and the administrator enters their attendance and work schedule on their behalf. If they later start using the app, you can send them an invitation via Convert account → Convert to account staff in the edit screen, and their existing attendance and annual leave records carry over as is.
3. Approve sign-up requests
Requests that come in through the sign-up link accumulate in the Sign-up Requests list below the active member list on the same Staff Management screen. If you have many members, scroll down to find it. Press Approve or Reject for each applicant.
Department and position are not assigned at the moment of approval. After approving, press Edit on that staff member in the active member list to assign their department and position.
4. Fine-tune each member's work conditions
In the active member list, press Edit on a staff member's row to open the user info edit screen.
- Department / Position — choose from the departments created in step 1 (you must pick a department before you can pick a position)
- Type — Staff / External collaborator (excluded from schedules, attendance, annual leave, and payroll)
- Employment type — Full-time / Part-time
- Start date / End date — entering an end date adds a "leaving soon" badge, and the member is automatically excluded from work planning after the end date (they're included in plans up to and including the month containing the end date)
- Personal working hours — set per-weekday hours only for staff who work differently from the clinic standard (e.g. a fixed day off, afternoons only). If they match the clinic standard, leave it empty and the clinic settings apply automatically.
- Schedule auto-fill — choose Auto-fill by pattern (default) / Explicit input only. This determines whether weekday shifts are filled automatically when the work plan is confirmed, or only the entries you input are applied. See step 2 of When you want to manage staff shift plans for the details.
- No attendance tracking — check this for members who don't clock in or out (e.g. the director). When checked, attendance records, late-arrival detection, and clock-in notifications are all skipped, and they don't appear in attendance status or statistics. Work schedules and annual leave still apply as usual. The default is unchecked (tracked).
If you need to block someone from working immediately, use Deactivate member in the Danger area at the very bottom of the edit screen. If they're still working, it's safer to just enter their end date first.
When you're done
- Next: When you want to manage staff shift plans
- For granting annual leave: When you want to manage staff annual leave