A clinic homepage as your touchpoint with patients
When you want to build a clinic homepage and chat booking
Create and publish your clinic's homepage, and let patients leave reservations directly through the reservation form. If you need more, you can grow the site into several pages and publish it in English, Japanese, and Chinese at the same time.
✅ Before you start
- Is the clinic's basic info (name, address, phone) accurate? If not → When you want to set up your clinic for the first time
- Administrators can start on the homepage and reservation form right now. However, to also attach live chat consultation (chatbot) to the homepage, the StepNote team must first enable the chatbot feature for your organization. Contact: support@stepnote.works
1. Create the homepage
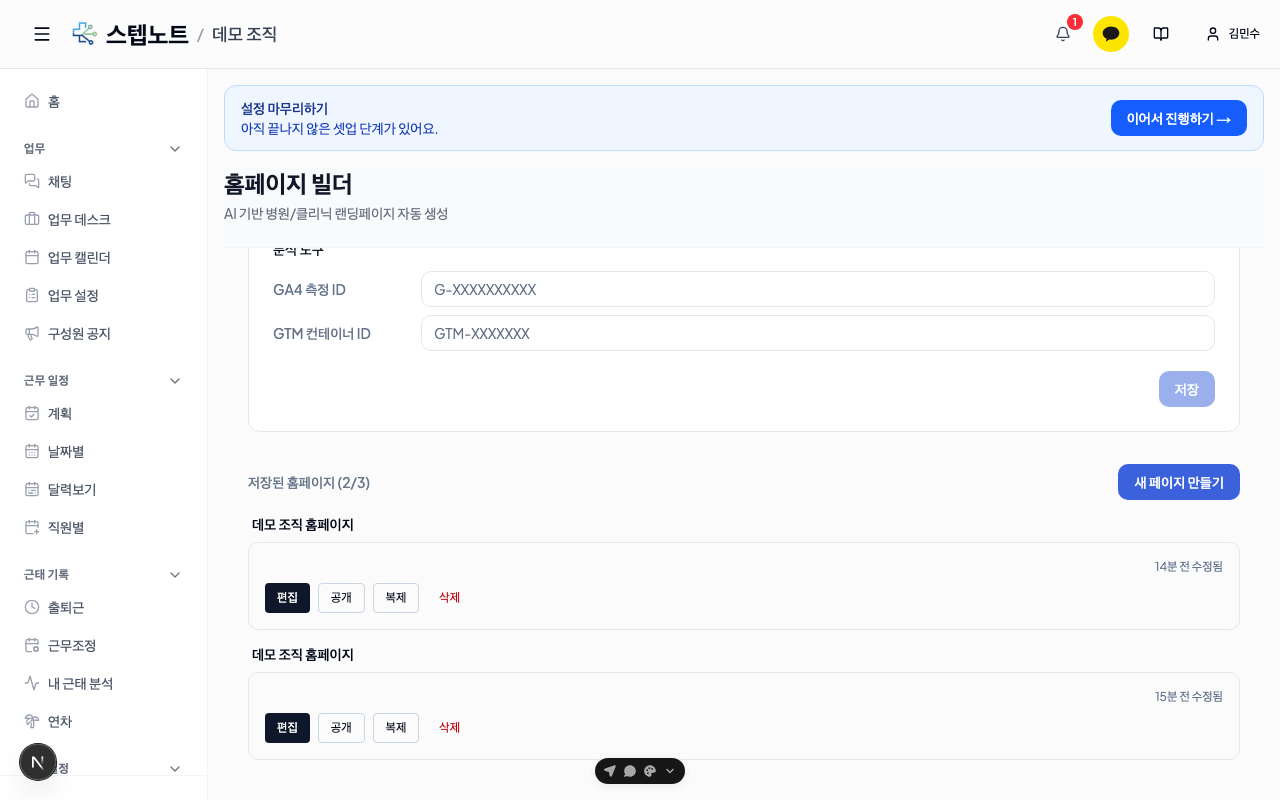
Go to Add-ons → Homepage in the left menu. In the "Homepage common settings" at the top, check the display phone number, address, and logo (if left blank, the clinic info values are used as is), then press Create new page in the "Saved homepages" card below to open the 4-step wizard.
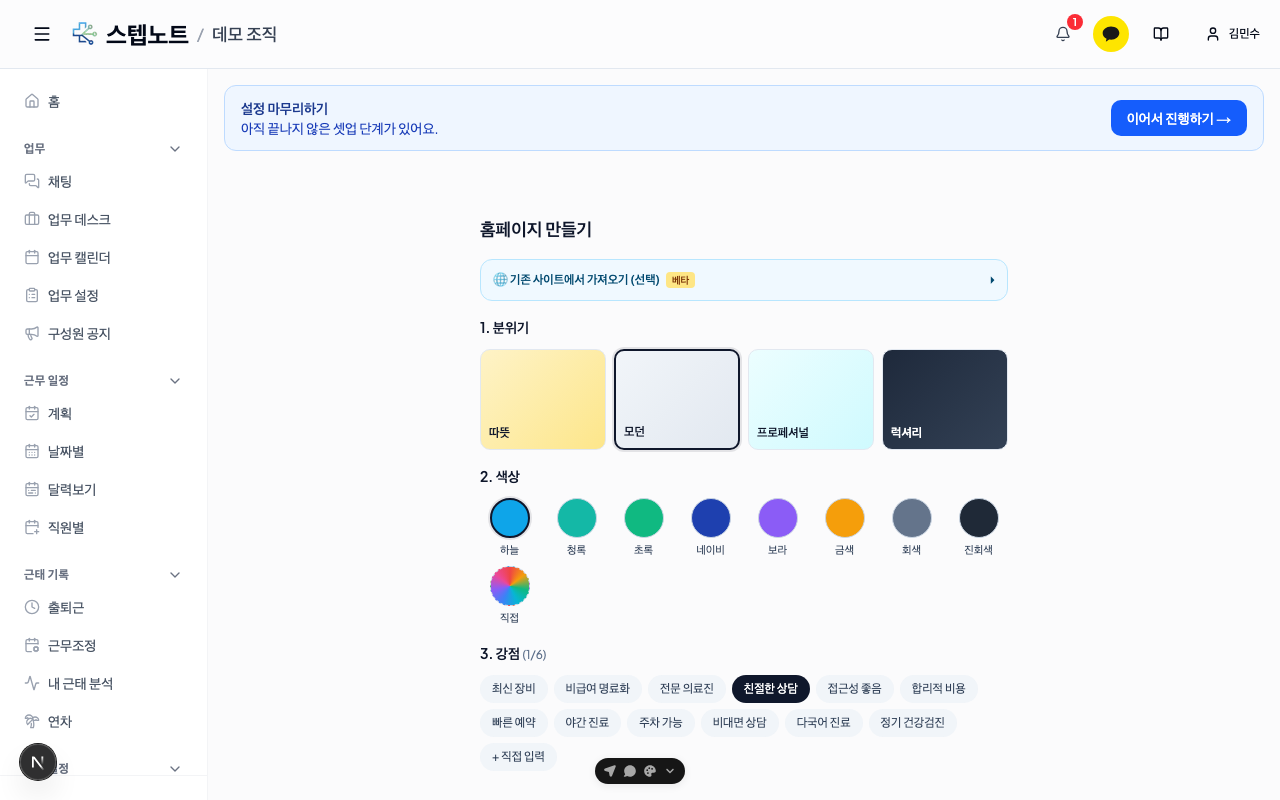
- Style — pick a sample card (design × color) you like. Click a card to preview it at full size and try out different colors.
- Strengths — pick 1–6, such as friendly consultations or the latest equipment.
- Clinic Info — clinic name, phone number, address, and services are already filled in from your registered clinic info, so you just need to check them; edit here directly if needed. For medical staff, check only the people you want to introduce on the homepage (everyone is unchecked by default).
- Review — see a summary of what you picked, and press Generate Homepage if everything looks right.
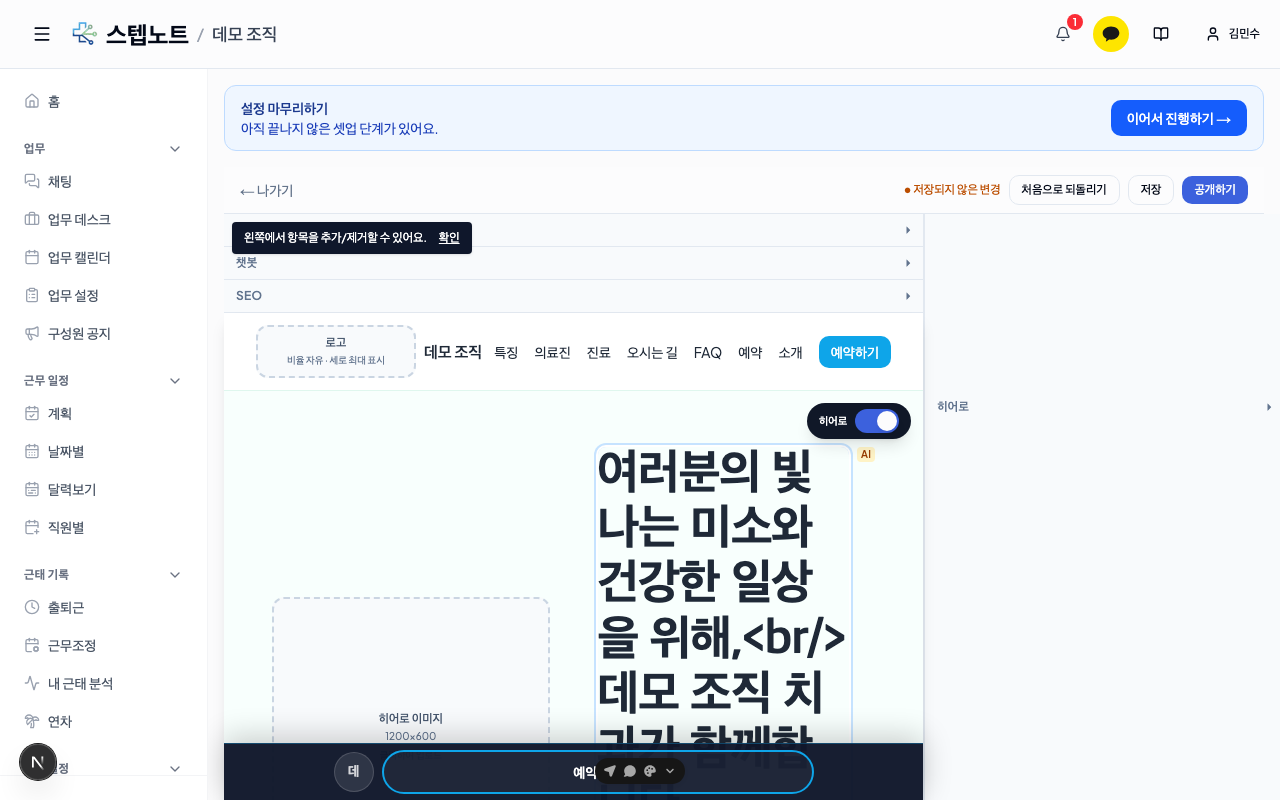
Press Generate homepage and the AI builds a design in about 20–40 seconds, then takes you straight to the edit screen. In the common-settings accordion above the preview (style settings, chatbot, SEO, languages), adjust the settings that apply to the whole page, and edit the content of each section — hero, introduction, reservations, and so on — in the right panel. Text on the screen can be fixed by clicking it directly, and the header logo is switched on and off with the "Show logo on the left of the header" toggle inside the Reservations item of the right panel. Once you've checked everything, press Save → Publish at the top. When published, the site is reachable at your clinic's own address (in the form {slug}.stepnote.site).
💡 If you already run a website, enter its address in "Enter a reference site" on the Step 1 style screen and press Analyze. The most similar sample will be selected automatically.
2. Receive reservations
- The generated homepage includes a reservation form by default. When a patient presses the Book now button, a window opens to enter their name, contact, date, and time, and submitting it registers the reservation immediately. No separate setup is needed — just publish the homepage.
- To also attach live chat consultation: after the StepNote team enables the chatbot feature for your organization, create a chatbot in Add-ons → Chatbot in the left menu, then select the chatbot you made in the Chatbot item of the homepage edit screen and save. A chat button is then attached to the published homepage, and patients can make reservations while chatting.
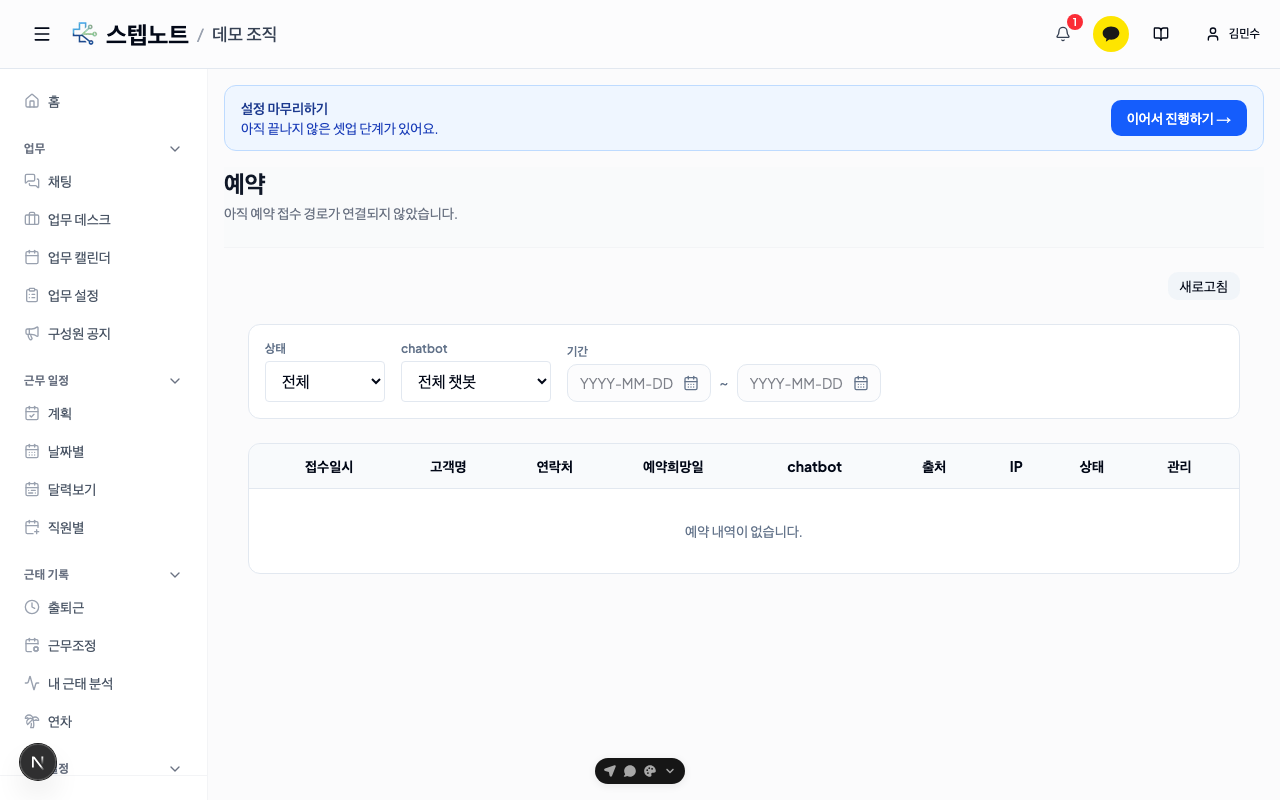
- Once either the reservation form or the chatbot is connected, received reservations gather in Add-ons → Reservations in the left menu, as a list you can search by status, chatbot, and period. If no channel is connected yet, this tab shows only a guidance screen and a button leading to the homepage.
3. Add more pages (optional)
If a single home page is enough, skip this. Items with a lot of content — services, doctors, directions — can be split into separate pages.
- In the Pages group at the top of the left sidebar on the edit screen, press
+ Add page. - Choose the type (service detail, doctor introduction, directions, blank page), the title, the parent menu, and the address, and the skeleton is created. AI can fill in draft text as well.
- Drag with the ⋮⋮ handle in the sidebar to reorder; that order becomes the header menu. A page placed under a parent becomes a submenu that opens on hover on desktop (menus go two levels deep).
- Each page must be set to
Publishbefore patients can see it, and the site itself must be published too. - You can create up to 40 pages, home included.
⚠️ Multiple pages is a feature you have to request. When it is off, the button reads
Add page (paid)and opens a feature inquiry window.
More detail: 8.4 Creating Multiple Pages
4. Publish in other languages (optional)
The Korean content stays as the source; turn on only the languages you need and publish them together.
- Open the Languages accordion in the common settings above the preview and check only what you need among English, 日本語, and 中文. Korean is the source and is always published.
- When you press Publish, only empty or outdated strings are translated automatically. To fill them right away, press
Translate now. Turning a language on does not translate anything by itself. - If wording reads awkwardly, fix it in
Refine translations. Strings you edit yourself are never overwritten by automatic translation. - Korean has no prefix in the address (
your-clinic.stepnote.site); English gets/enand Japanese/ja. With two or more languages on, a language switcher appears automatically in the published page's header. - Anywhere a translation is still missing, the Korean text shows through, so publishing before everything is translated does not break the page.
More detail: 8.6 Publishing in Multiple Languages
When you're done
- To start over from the beginning: When you want to set up your clinic for the first time